The STLs are already in print orientation. Start from the Bambu Studio 0.20mm Standard profile and change these settings:
Open-source hardware from Joga
Joga Neck
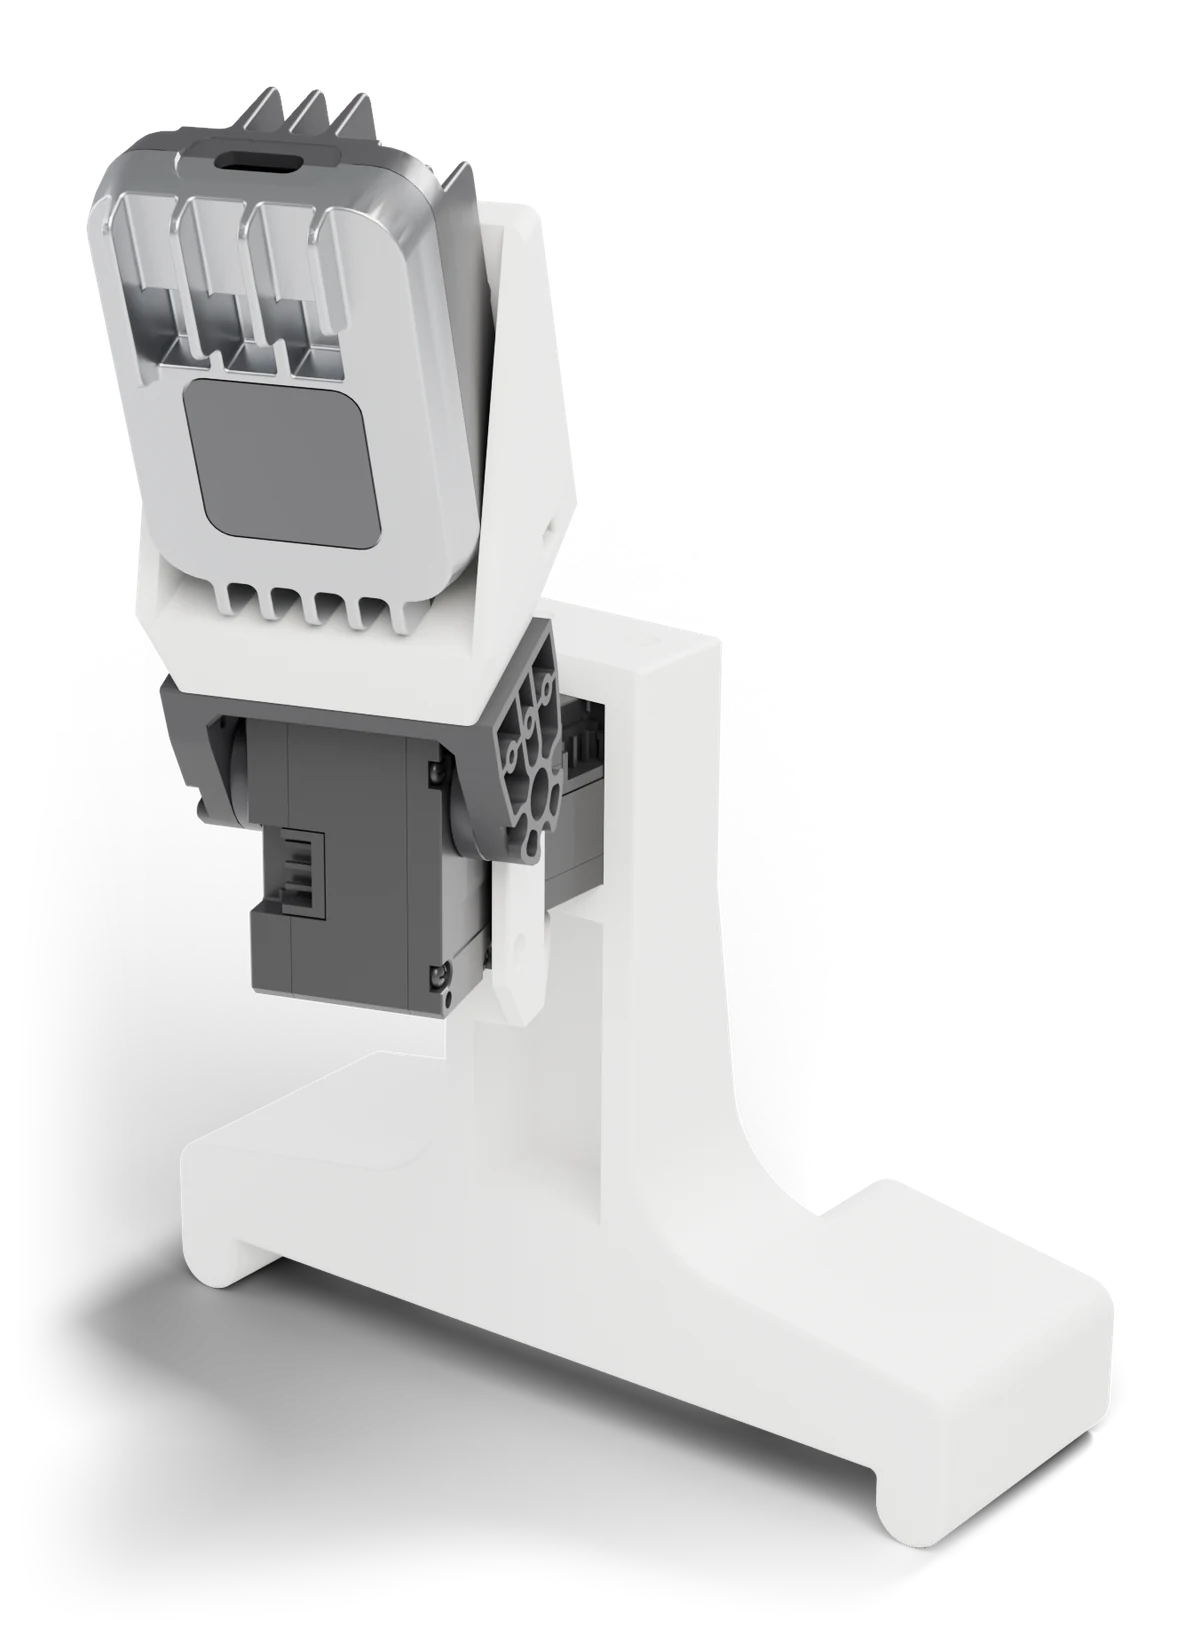
A 2-DoF active camera neck for the Unitree G1
Two DYNAMIXEL servos point an RGB camera so the G1 can keep the ball in view while it plays. This page covers everything you need to build one.
±90°
Yaw range
20° / 90°
Pitch range, up / down
≈178 g
Total mass
0.93 N·m
Stall torque per axis
Parts
| Qty | Part | Notes |
|---|---|---|
| 2 | DYNAMIXEL XC330-M288-T | Yaw and pitch servos, 5 V. |
| 1 | ROBOTIS U2D2 | USB interface for the servos. |
| 1 | U2D2 Power Hub Board | Powers the servo bus. |
| 1 | DROK 12 V to 5 V converter | Steps the G1's 12 V down to 5 V. |
| 1 | Luxonis OAK-1 W | Camera. |
| 1 | Locking USB-C cable | Camera to your computer. |
| – | USB cable, 2× DYNAMIXEL 3-pin cables, XT30 plug, 16–18 AWG silicone wire | Wiring. |
| – | M2 screws (included with the servos), 2× M4 × 10 mm screws | Fasteners. |
| 4 | Printed parts | Torso Mount, Yaw-Pitch Bracket, Output Bracket, Camera Mount. |
The full list is in BOM.md. The 12 V XC330-T288-T fits the same parts and removes the need for the converter.
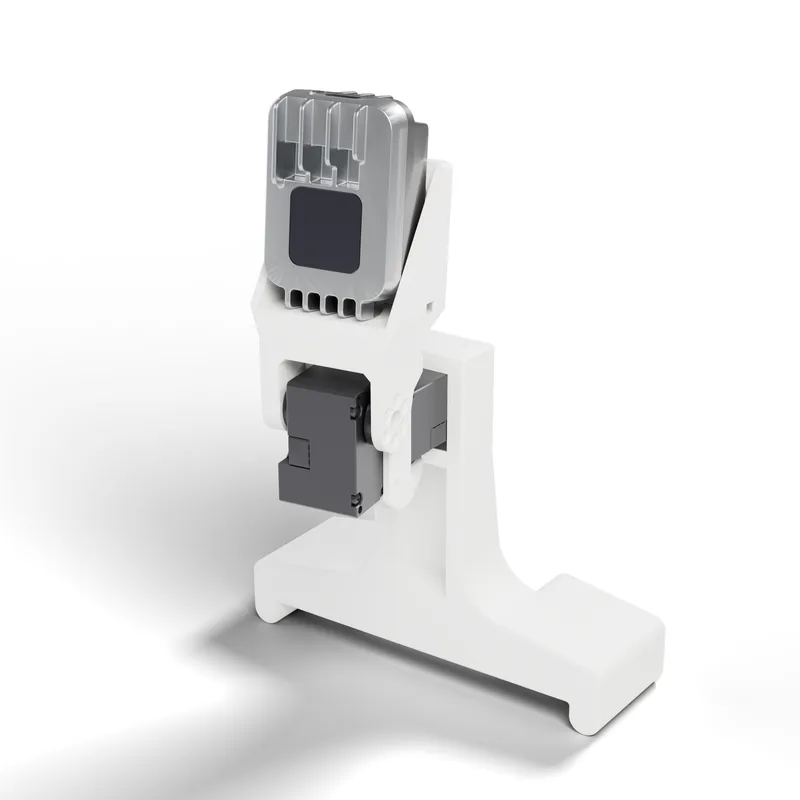
Unitree version
We also have a version with two Unitree J288 servos. They run directly on the G1's 24 V, so it needs no converter. It shares the Torso Mount, camera, and kinematics with the DYNAMIXEL version. The cheaper plastic S288 also fits, but it is less durable and only takes 12 V.
Printing
| Material | PETG (PLA also works) |
| Wall loops | 4 |
| Sparse infill | 25%, gyroid |
| Supports | Tree (auto) |
Assembly
The arrow shows how each new part goes in. New printed parts are orange.
-
 1
Yaw servo into the Torso Mount
Slide the servo in from the front, output axis vertical, and fix it with 2× M2 from the back.
-
 2
Pitch servo into the Yaw-Pitch Bracket
Slide the second servo into the bracket, output axis sideways, and fix it with 2× M2.
-
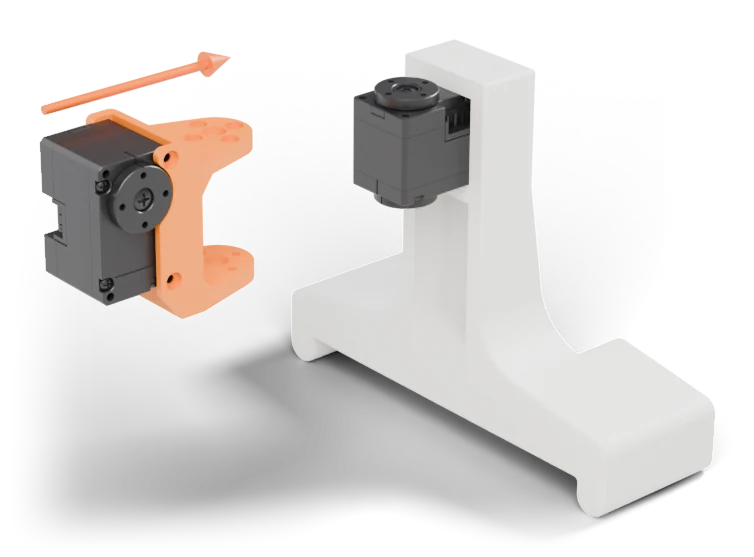 3
Bracket onto the yaw servo
Slide the bracket onto the yaw servo so its arms straddle both horns, then screw it to both horns.
-
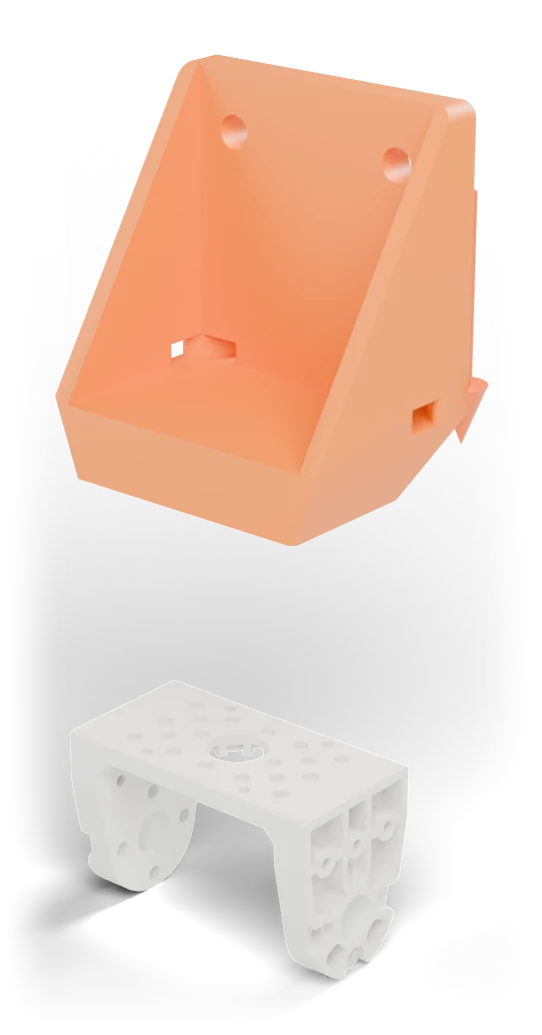 4
Camera Mount onto the Output Bracket
Screw the Camera Mount to the top of the Output Bracket with M2 self-tapping screws from below.
-
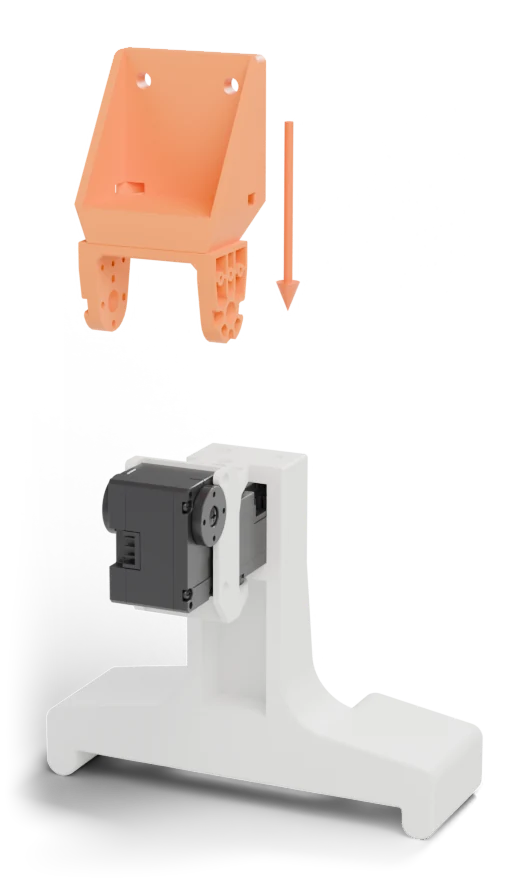 5
Output Bracket onto the pitch servo
Lower it onto the pitch servo so the arms straddle both horns, then screw it to both horns.
-
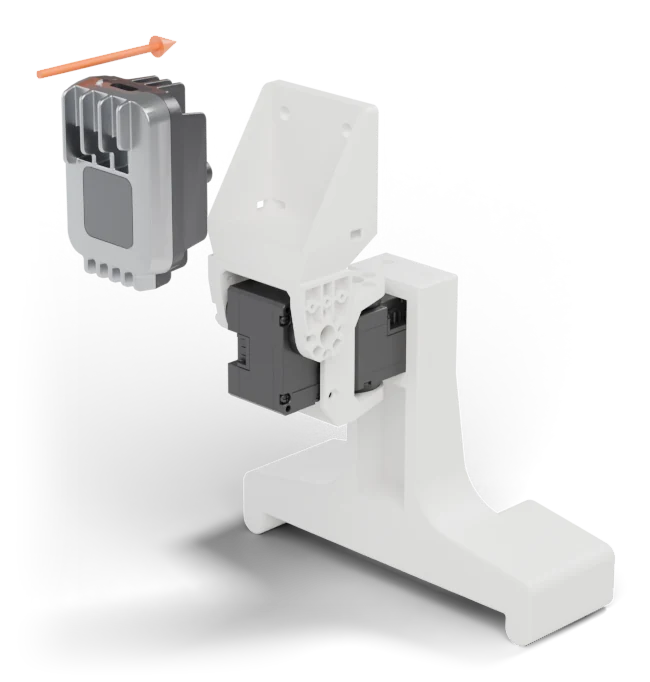 6
Camera onto the Camera Mount
Seat the OAK-1 W lens forward and fix it with 2× M4 × 10 mm from the back.
Mounting on the G1

- Power the robot off and remove the two red and two blue screws.
- Lift off the front neck cover and disconnect its microphone cable. The cover and red screws stay off.
- Fasten the Torso Mount with the two blue screws through the holes in its back.
Wiring
Power
G1 12 V portXT30
12 V
DROK converter
5 V
U2D2 Power Hub
TTL
Yaw servo
TTL
Pitch servo
Data
U2D2
USB
Your computer
OAK-1 W
USB-C
Your computer
Use 16–18 AWG silicone wire for the power runs, and leave enough cable slack for the full range of motion.
Use a locking USB-C cable for the camera. A plain plug will eventually break the OAK-1 W's USB port. In a pinch, zip tie the cable through the strain relief holes in the Camera Mount.
Citation
@misc{joga2026,
  title        = {Joga: Learning Agile Humanoid Soccer Skills with Active Vision},
  author       = {Narula, Avinash and Nguyen, Khai and Fey, Nolan and Parsuram, Venki and Marangola, John and Peticco, Martin and Agrawal, Pulkit},
  year         = {2026},
  howpublished = {\url{https://joga.csail.mit.edu/}}
}
Released under CC BY 4.0.